EQ8 and Sampler Quilts
I bet you forgot I had this blog, didn't you? I sure did! It's been a busy summer, and, truly, a busier year filled with more exciting opportunities (and deadlines) then I ever expected. And, I can't even prove it to you because most of it has been secret!
One thing I can and have shared throughout the first half of the year is my headlong tumble into pattern writing, which has been hugely fueled by an unexpected Christmas gift of Electric Quilt 8. All three patterns (Picnic Blanket, Log Lodge, and Roundcut) that I've released so far this year, plus a number of patterns for secret projects or that I just haven't gotten around to yet were designed in EQ8, so when they asked if I would serve as an EQ Media Partner for a few months, it was the perfect incentive to write up some blog posts about it.
If you are interested in quilt design software, strap in! I'm hoping to talk a little bit about how I use it in my pattern design, and even how I use it for helping to plan quilts if I'm making a pattern by someone else! Also, until the end of September, if my posts just prove too persuasive and you have to get your hands on EQ, you can use the promo code on the button below (which will link you to EQ's website, not an affiliate link) for 20% off any EQ products!
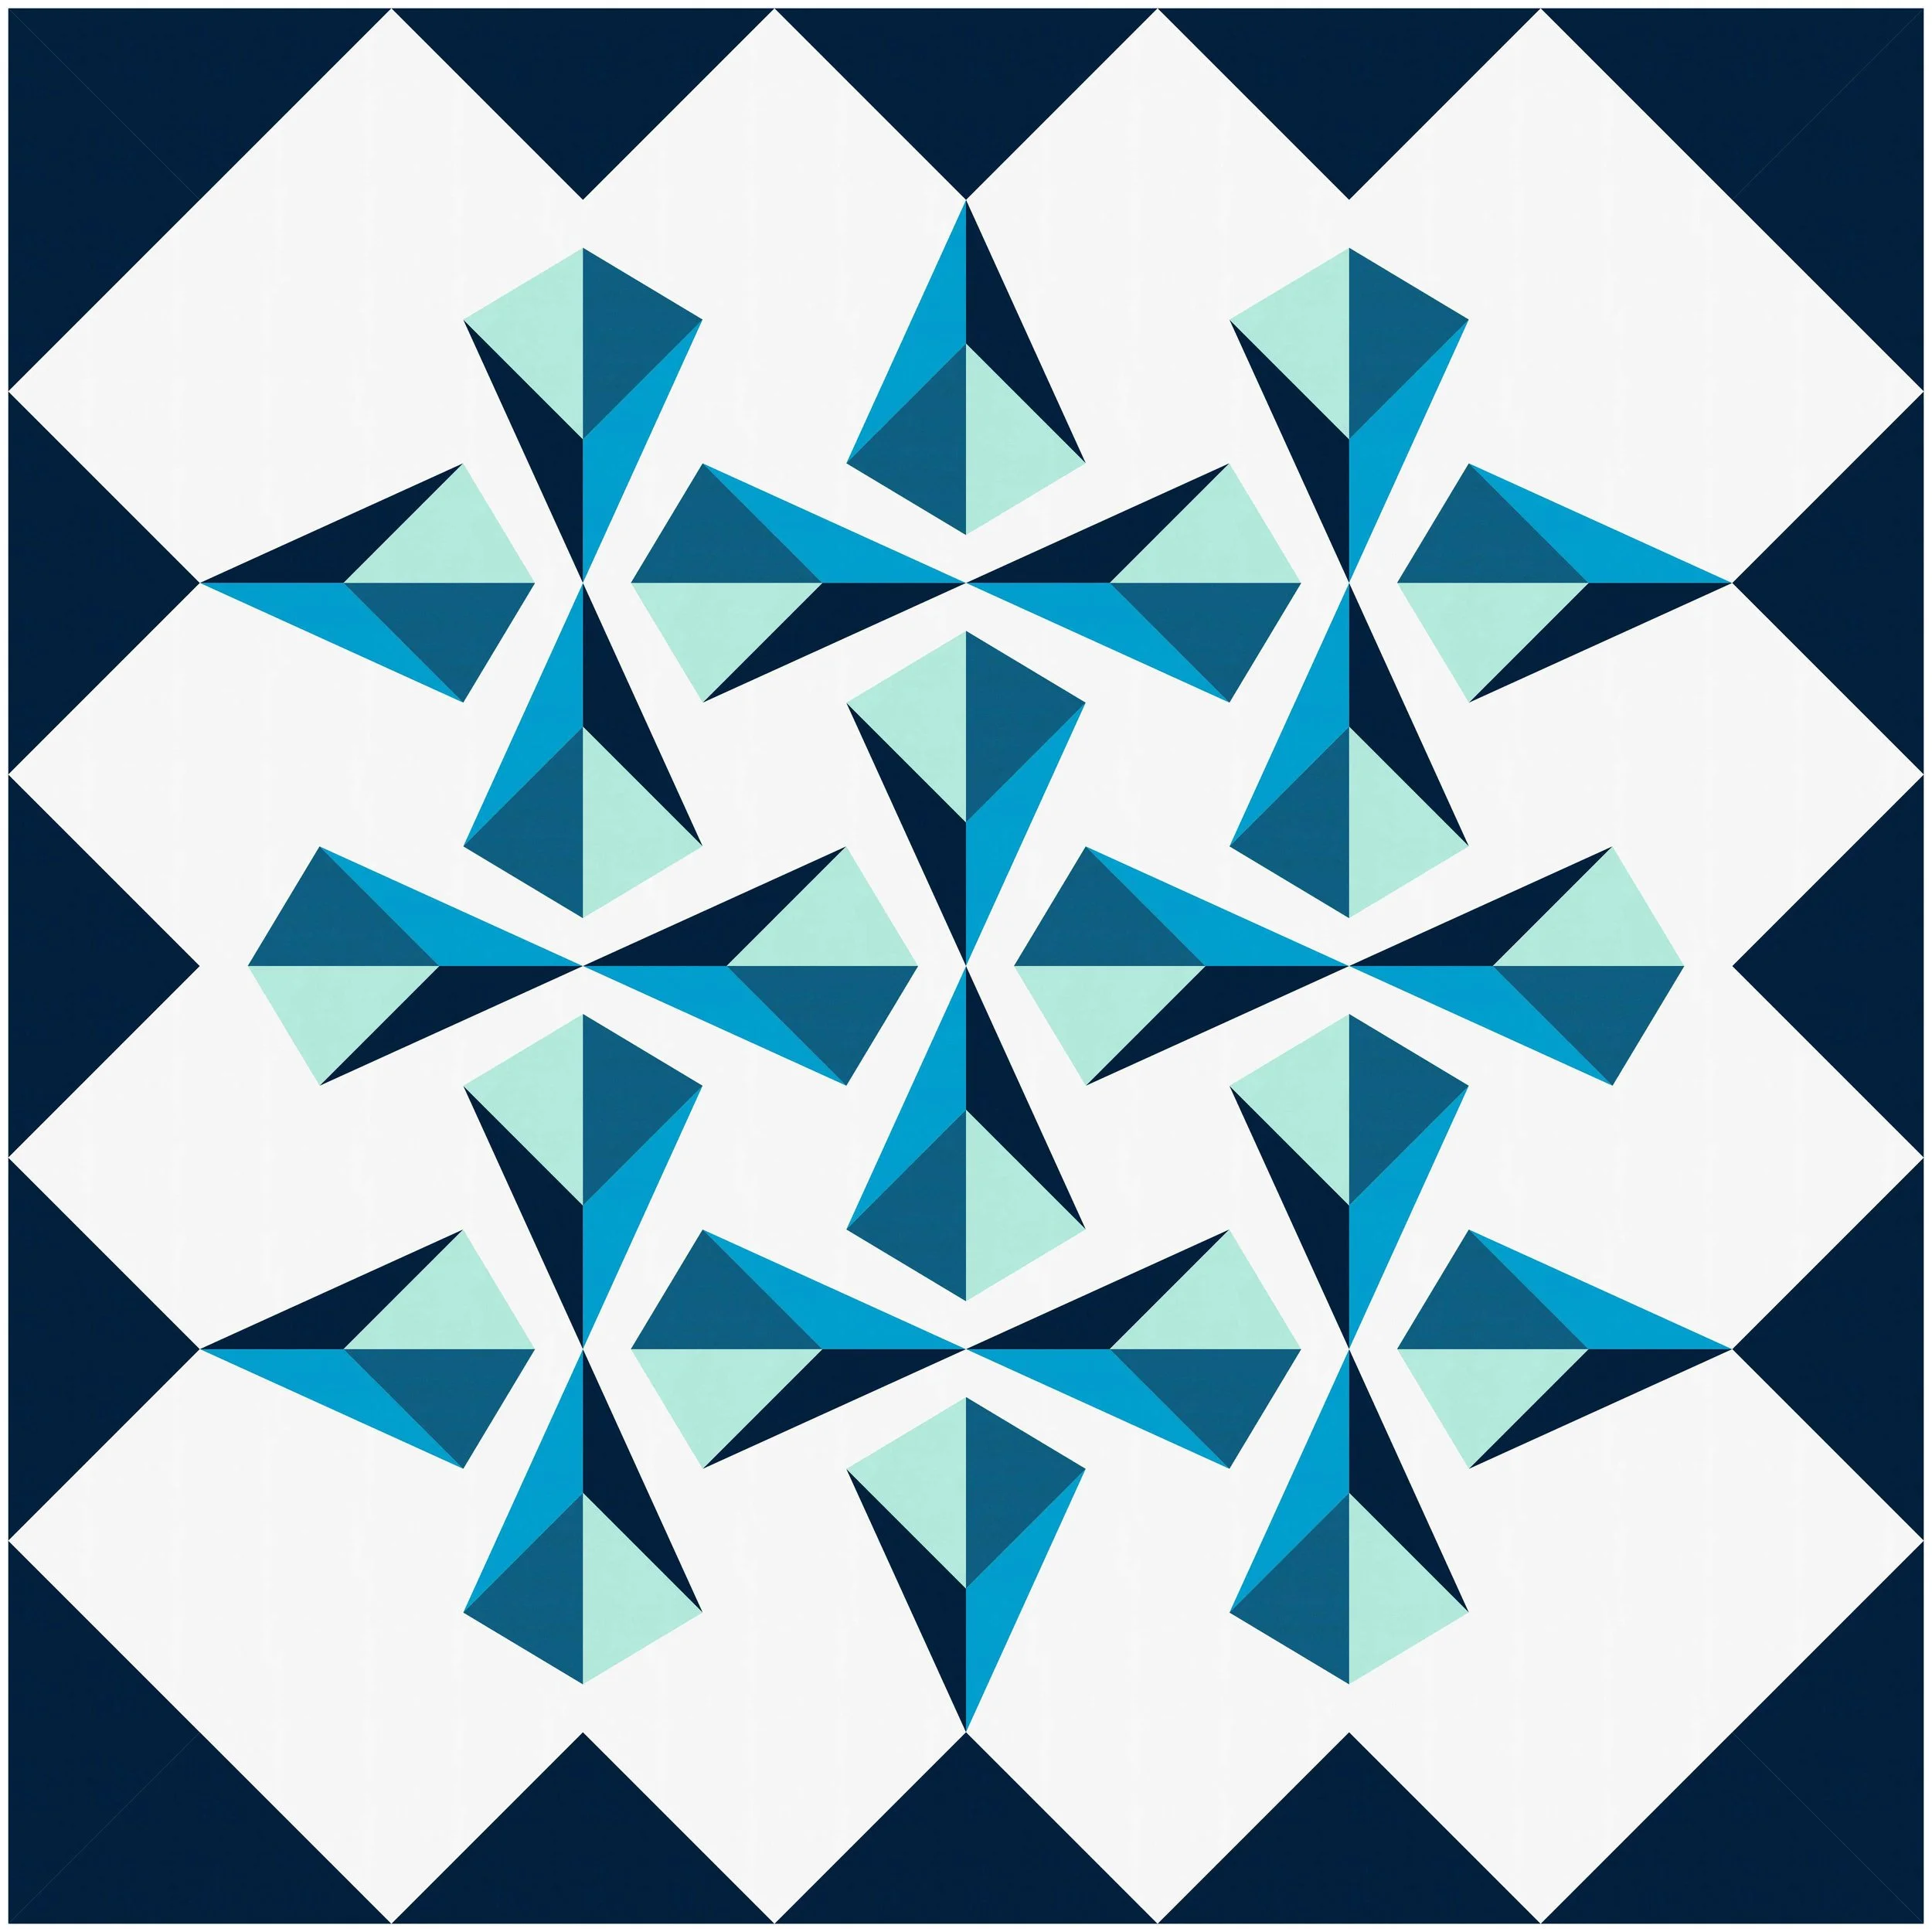
Anyway, if you've been around awhile, you'll remember that I did the big Summer Sampler back in 2016 in all Camelot Nordic fabric:
I skipped last years' because I just wasn't that crazy about the design and I was doing my Modern Makers sampler, but I jumped back in this year! I pushed myself in 2016 to use only prints, so even though I retreated to my solids comfort zone, I decided to push myself to use a non-white background. This is a challenging thing! But, I took some color inspiration from my Rifle Paper Co calendar and got to work, and somehow we're already halfway done!!
I love the dark background, and I love how it makes everything pop! But, it has been a challenge to work with at times, and some of the blocks require a lot of color swapping. That's where I'll get EQ involved. In fact, EQ is a great way to play with color palettes, and building these blocks is a great way to play around with and learn some of EQs functionalities.
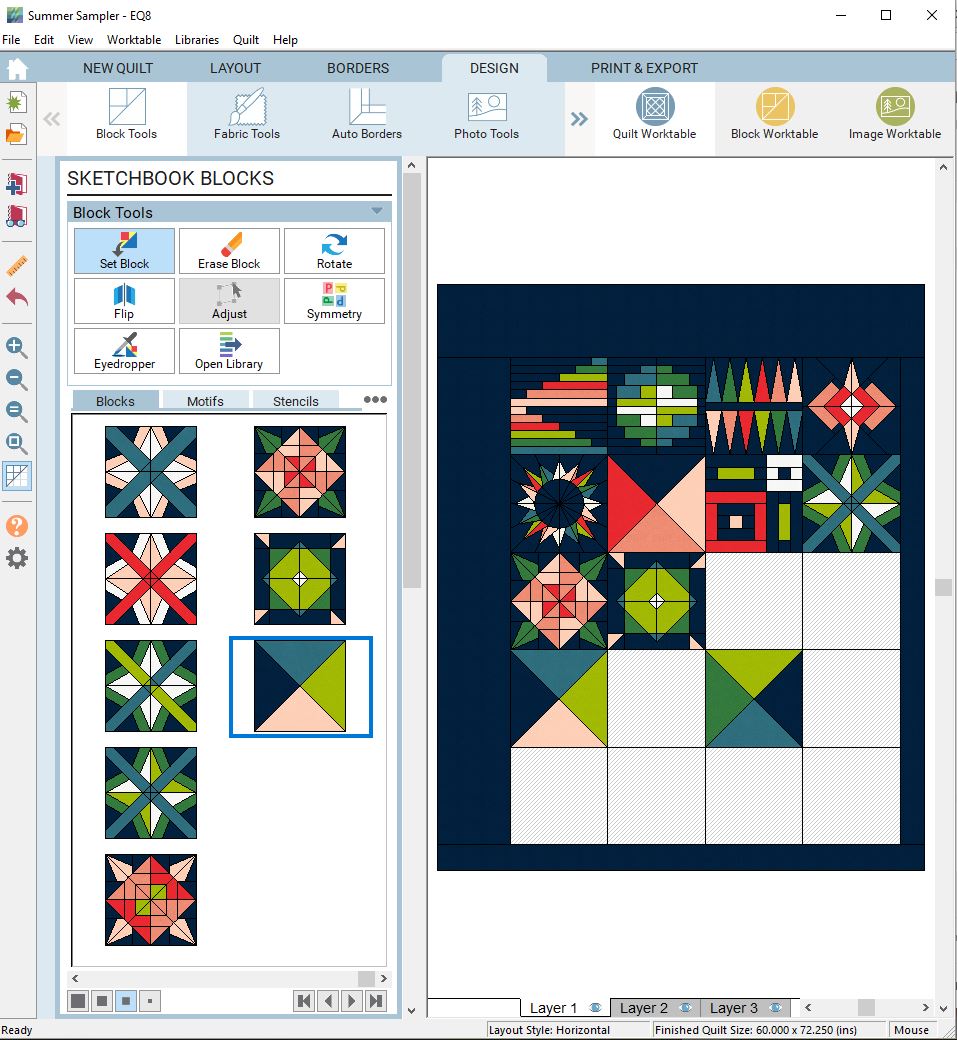
This is what the EQ quilt worktable looks like (click on it to make it a bit bigger!). I set it up so I could play around with blocks each week and see how the colors work for each block as well as with the other blocks I've completed so far. The blocks aren't perfect, but they're close enough for planning purposes. When you're in the quilt worktable, you have control over the layout, whether or not you want borders, and you can add blocks and change colors as you want. You can see that I set up a layout that has asymmetrical borders, and the blocks will be in a four by five grid without sashing.
Another thing you can see in the block panel on the left is how many different color palettes I've played with for some of the blocks, and those aren't even all of the variations! If I click to the "Fabric Tools" on the top left, I can set up a color palette with actual Kona swatches. I love this feature because I don't have to approximate colors, nor do I have to spend time searching through the whole library every time I want to start a new block. It also serves as a good documentation of what fabrics I used for when I inevitably run out, forget exactly WHICH of the forty blues I bought, and need to buy more.
To give you an idea of a simple workflow for how I go from mocking up the block to dropping it in the quilt, I'll use the super basic hourglass filler blocks that this quilt uses to round out to 20.
1. This is what the block worktable looks like. You can draw blocks here, or you can add prefab blocks from the EQ library directly to the quilt. I set my size and used the pencil to draw my hourglass seams, just like graph paper.
2. You can color the block before dropping it into the quilt, or wait until the next step and color it in there! Once you have it where you want it, you add it to a project "sketchbook" so you can work with it in the quilt worktable.
3. Adding it to the sketchbook in the previous step is how it gets into your block panel (see it selected with the blue frame). Now I can drag it onto my quilt.
4. And just like that! Another cool feature of the quilt worktable is that you can turn the seam lines on and off. Having them on helps with placement, and turning them off helps you see what the quilt will actually look like.
Once you've dropped your new block into your quilt, you can go back to the fabric tools and make any color adjustments you want. This has been so helpful in getting me around the mental block I have with non-white backgrounds, and I think I've gotten much more creative with my coloring in blocks because I can so easily and quickly try a bunch of different colors! We'll see what the back nine blocks bring :)